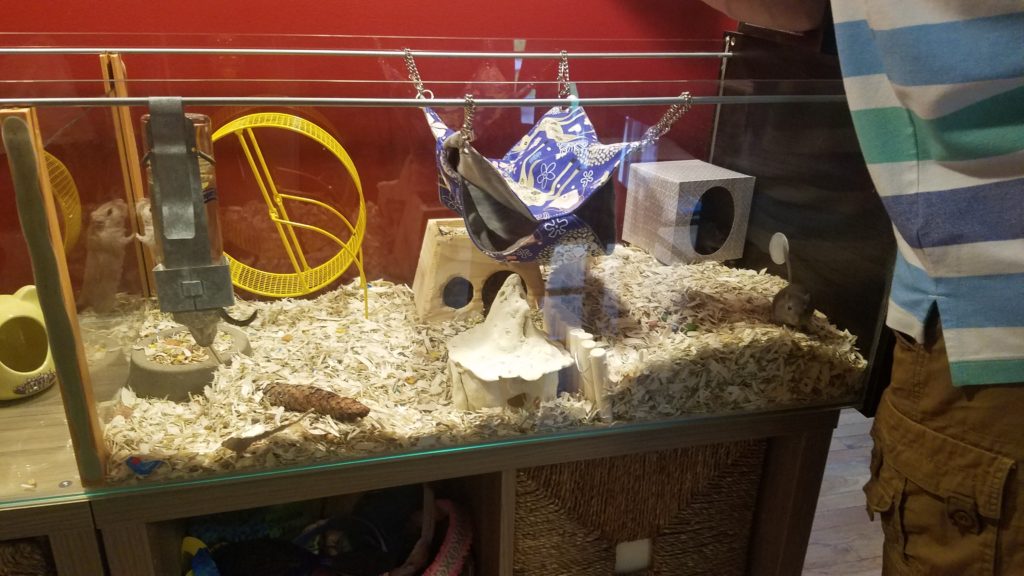
You can see the finished product all the way on the bottom
We finished the cabinets and they are awesome!!! We still have to fix the tank top but otherwise its great! We made it so there are two cages with a glass separator in the middle. It only took a few days to build. You can learn to make a really nice gerbil cage.
Here is instructions on how to make a Detolf cabinet into a awesome gerbil cage.
Materials to Make the Gerbil Cage.
you will need..
- Detolf cabinet
- Construction adhesive glue
- Pieces of U-Profile (optional)
- A parent to help you
- Clear Silicone
- Mesh wire (make sure that the spaces are not big)
- Pieces of wood
- L shapes of connector metal and
- Nails

Instructions to transform the Ikea Detolf cabinet into a gerbil cage
- Take out the door of the cabinet
- Remove the metal frame out of the cabinet. Most importantly, MAKE SURE THAT YOUR PROJECT DOES NOT FALL APART!!! You may need help with this part
- Take the metal frame and saw off the cross bars and bottom, so only the top bar stays intact.
- Move the top and the bottom of the cabinet
- Insert glue in the slot of one side.
- Then put the cabinet together and let it stand on the side with the glue. So there is pressure from its weight on the glue. Let the glue dry (24 hours) and then put clear/white silicone.
- Redo step 5-6 to the other side of the cage and let it stand on the other side to dry now. (using its weight to pressurize the glue)
- Put the metal rails (frame) in on the top of your cage
Optional-make more cages out of the cabinet
- Use the glue to attach the U-profile to 1/2 of , 1/3, or 2/3 of the way down the cage
- Let the glue dry
- Slide in one of the glass sheets.


Super TIP
You can find second hand Ikea Detolf cages on Craigslist, Letgo etc.
Then you will have a super cheap and super large cage 🙂

How we made the cover for the Ikea Detolf Cabinet
- Cut the wood sideways into the size of each cage to create a top.
- Use the metal “L”s to attach each piece of wood to another
- Place the wire mesh on top of the 1st layer of wood
- Repeat step 9-10
- Lastly, nail the 2 layers of wood and the wire mesh together using nails

And the decorated Ikea Detolf Cage


